
Vinyl Siding Installation Guide: Step-by-Step Process
Upgrading your home’s exterior is a big decision, and understanding vinyl siding installation helps ensure the project is done right from start to finish.
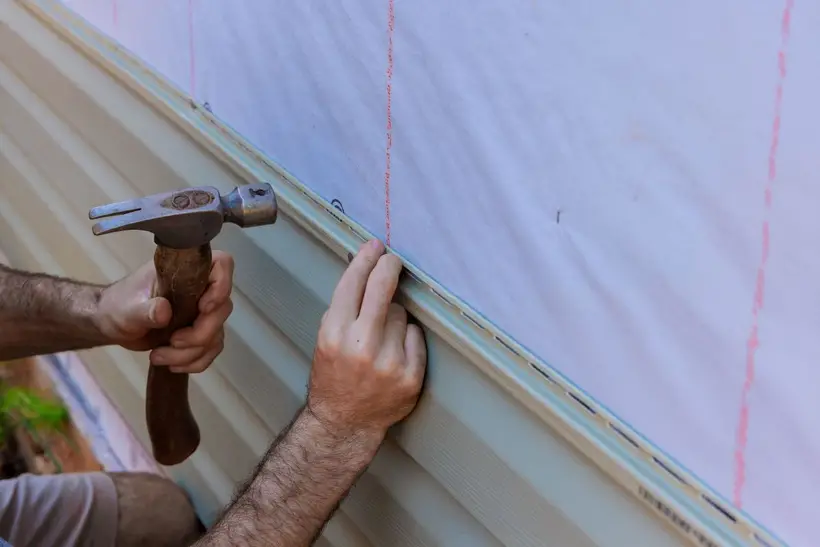
Upgrading your home’s exterior is a big decision, and understanding vinyl siding installation helps ensure the project is done right from start to finish. Proper installation directly impacts durability, energy efficiency, and appearance. If you are planning an upgrade, reviewing professional vinyl siding installation services and options can help you better understand what to expect throughout the process.
- Learn how vinyl siding is installed step by step
- Understand what preparation is required before installation
- Discover common mistakes to avoid during installation
- Get tips to ensure long-lasting performance
Why Proper Vinyl Siding Installation Matters
Installing vinyl siding is not just about attaching panels to your home. It is a precise process that ensures your siding performs well in all weather conditions and lasts for decades. Poor installation can lead to issues like warping, moisture intrusion, and reduced lifespan.
For homeowners in Clarksville, VA and surrounding areas, where humidity and seasonal temperature changes are common, proper installation is essential for protecting your home.
Here are key reasons why installation quality matters:
A properly installed system will not only look better but also perform better over time.
- Moisture Protection : Prevents water from getting behind the siding and causing damage
- Durability : Ensures panels can expand and contract without cracking or warping
- Energy Efficiency : Improves insulation and reduces energy loss
- Curb Appeal : Creates a clean, uniform look across your home’s exterior
- Long-Term Value : Reduces the need for costly repairs or early replacement
7 Step-by-Step Vinyl Siding Installation Process
Understanding the installation process helps homeowners know what to expect and ensures the job is done correctly. Each step plays a critical role in the final result.
1. Inspecting and Preparing the Exterior
Before installation begins, the existing exterior must be thoroughly inspected.
This step ensures that the structure beneath the siding is sound and ready for new materials.
Key tasks include:
Proper preparation creates a stable foundation for the new siding.
- Removing old siding if necessary
- Checking for rot or structural damage
- Repairing any compromised areas
2. Installing a Weather-Resistant Barrier
A weather-resistant barrier is installed to protect the home from moisture.
This layer acts as a secondary defense against water intrusion.
Benefits include:
This step is especially important for homes in Clarksville, VA and surrounding areas where humidity can be a concern.
- Prevents moisture from reaching the structure
- Improves overall durability
- Enhances energy efficiency
3. Adding Starter Strips and Trim Pieces
Starter strips and trim pieces are installed to create a framework for the siding panels.
These components ensure proper alignment and secure attachment.
Important elements include:
This step sets the stage for a professional-looking finish.
- Starter strips at the base of walls
- Corner posts for clean edges
- J-channels around windows and doors
4. Installing Insulation (Optional but Recommended)
Adding insulation beneath vinyl siding improves energy efficiency and comfort.
While not always required, it is a valuable upgrade.
Advantages:
Many homeowners in Clarksville, VA and surrounding areas choose this option for added performance.
- Reduces heat transfer
- Improves indoor temperature control
- Lowers energy costs over time
5. Attaching Vinyl Siding Panels
Vinyl siding panels are installed from the bottom up, overlapping each row.
Proper technique is critical to allow for expansion and contraction.
Key considerations:
Incorrect installation at this stage can lead to warping or buckling.
- Panels should not be nailed too tightly
- Space must be left for movement
- Alignment must remain consistent
6. Securing Around Windows, Doors, and Edges
Special attention is given to areas around openings and edges.
These areas are more vulnerable to moisture and require precise installation.
Steps include:
This step protects your home from water damage and improves overall performance.
- Installing flashing around windows and doors
- Sealing gaps to prevent leaks
- Ensuring proper drainage
7. Final Inspection and Cleanup
The final step ensures everything is installed correctly and looks professional.
Contractors will:
A thorough inspection ensures the siding is ready to perform for years to come.
- Check for alignment and secure panels
- Inspect for gaps or issues
- Clean up the work area
Common Mistakes to Avoid During Installation
Even though vinyl siding is considered easier to install than other materials, mistakes can still happen. Avoiding these issues is key to long-term performance.
Improper Nailing
- Nailing too tightly prevents expansion
- Panels may warp or buckle over time
Skipping Moisture Barriers
- Increases risk of water damage
- Can lead to mold or rot behind siding
Poor Alignment
- Creates an uneven appearance
- May compromise structural integrity
Ignoring Ventilation
Working with experienced professionals helps prevent these common issues.
- Traps moisture behind siding
- Reduces lifespan
How Long Vinyl Siding Installation Takes
The timeline for vinyl siding installation depends on several factors, including home size, weather, and project complexity.
Typical timelines:
Factors that can affect timing:
For homeowners in Clarksville, VA and surrounding areas, scheduling during favorable weather conditions can help ensure a smoother process.
- Small homes: 3 to 5 days
- Medium homes: 5 to 7 days
- Larger or complex homes: 1 to 2 weeks
- Removal of old siding
- Weather conditions
- Structural repairs
Vinyl Siding vs Other Installation Methods
Understanding how vinyl siding installation compares to other materials can help you make a more informed decision.
Vinyl vs Fiber Cement Installation
- Vinyl is lighter and easier to install
- Fiber cement requires specialized tools and labor
- Vinyl projects are typically completed faster
Vinyl vs Wood Installation
- Vinyl requires less preparation
- Wood installation involves more customization
- Vinyl is more consistent and predictable
Vinyl vs Metal Installation
- Vinyl is quieter and more flexible
- Metal requires more precision for cutting and fastening
- Vinyl is generally more forgiving during installation
Quick Comparison Table
This comparison highlights why vinyl siding is often chosen for its ease of installation and cost efficiency.
- Feature Vinyl Siding Fiber Cement Wood Metal
- Installation Speed Fast Moderate Moderate Moderate
- Complexity Low High Moderate High
- Cost Lower Higher Moderate Higher
- Maintenance Low Moderate High Low
Tips for a Successful Vinyl Siding Project
Planning and preparation are key to achieving the best results from your siding installation.
Choose Quality Materials
- Higher-quality vinyl lasts longer
- Better resistance to fading and cracking
- Improved overall performance
Work with Experienced Contractors
- Ensures proper installation techniques
- Reduces risk of future issues
- Provides peace of mind
Plan for Proper Maintenance
- Clean siding regularly
- Inspect for damage
- Address issues promptly
Consider Long-Term Value
For homeowners in Clarksville, VA and surrounding areas, these steps can help ensure a successful and long-lasting project.
- Focus on durability and performance
- Avoid cutting corners on installation
- Invest in quality workmanship
Upgrade Your Home with Professional Vinyl Siding Installation
Vinyl siding installation is a valuable investment that enhances your home’s appearance, protection, and efficiency. When done correctly, it provides long-lasting performance with minimal maintenance.
Understanding the process helps you make informed decisions and ensures your project runs smoothly from start to finish. From preparation to final inspection, every step plays a role in the overall outcome.
Kenneth Daniel Roofing is dedicated to delivering high-quality results and helping homeowners protect their investment. If you are ready to start your project or need expert guidance, contact us today to schedule your consultation and take the next step toward a stronger, more beautiful home exterior.